Back then, Android support on Chromebooks started with Android 6.0 that only allows applications to launch either in a full screen mode or a smaller static size. Those two options are not really the best layout for several applications on Chromebook and Google figured it out and had modified this Android 7.1.1. However, you have to do a few tweaks to get it to work since resizing does not work out the gate. To do this, follow the instructions provided:
Step 1: You have to check first what version of Android your Chromebook is running.
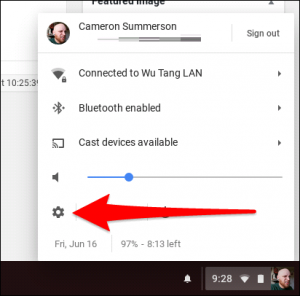
The first thing you have to do is to make sure that your Chromebook runs an Android version that has the ability to resize apps. To get started, click the system tray and then the gear icon for Settings.
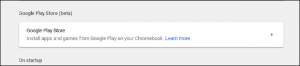
Step 2: After that, navigate down to the Google Play Store menu and then click it.
Step 3: After clicking Google Play Store, click the Manager Android preferences to open the Android settings options.

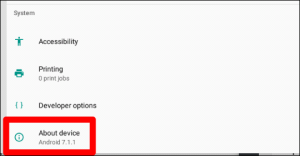
Step 4: To check what Android version you have, navigate to the bottom part of the screen to go to the About Device section, which is usually placed after the Developer options
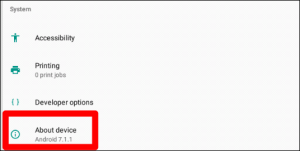
After checking and you’ve found out that your Chromebook is running 6.0, then I’m afraid you’ll have to settle for either a full screen mode or a smaller static size screen for your apps. However, if your Chromebook is running 7.1.1 or above, then continue reading the instructions.
Step 5: Enable developer options.
If you’re still on the Android Settings menu, you can go ahead and enable Developer options since you will need it to resize your apps. First, tap the About Device option.
Step 6: After that, tap the Build number seven times and then you will see a small toast at the bottom of the screen that notifies you about how many taps left until you become a developer.
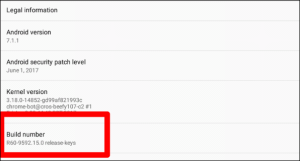
After seven taps, the Developer options will now be enabled.
Step 7: Enable the Window resizing.
Tap the back button to go back to the main Settings menu. Navigate until you see a new option called Developer options. Tap that one.

Step 8: Just ignore all the other options you see and navigate to the very bottom of the screen and look for “Allow free window resizing by dragging the border” option. Tap on it and then enable it.
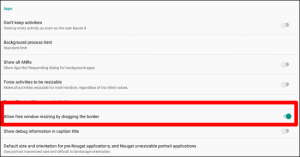
And viola, you will now be able to resize your Android apps. Just take note though that this does not work for all apps especially the ones who aren’t up to date. However, no need to worry since many modern apps with good developers is on board with resizing Android apps. To resize apps, all you have to do is to hover over the edge of your app window, the same thing you do with any other window. The cursor will change that will indicate that you can resize the window.
Step 9: Set the default size for pre-nougat apps.
This is an optional step and you can stop at step 8 since that’s pretty much how you resize Android apps. However, this step is worth checking out since it will determine the default size for apps that aren’t designed for Android Nougat. It’s called the “Default size and orientation for pre-Nougat applications, and unresizable portrait applications”. Tap on it.
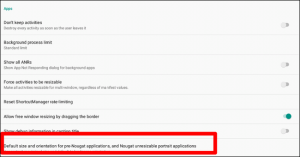
This option helps you find out what’s going to work best for the way you use your Android apps n your Chromebook. For some users, setting the default maximum size and landscape orientation works for them since some apps like Instagram is portrait-only, launch full screen while other apps will open in landscape mode. It works for some; so basically, choose what fits your boat.

After you’re done, just close the window and you’re good to go.