If you’re considering switching to Android, then you might want to take the operating system for a spin before you buy an expensive smartphone or tablet. If you don’t want to visit your nearest Best Buy and try out the Androids on display, then you can test out our favorite mobile OS from the comfort of your own home.
How does that work? Well, using a program called Virtualbox, you can simulate the Android OS on your PC and use it just like you would on a smartphone or tablet.
Here’s a step-by-step guide to using Android on your PC through Virtualbox
Step 1) Download and install Virtualbox
Step 2) Download Android 4.0 RC from here (you’ll find the right copy by scrolling down and looking for the Android-x86-4.0-RC1 section. There are a few different options to download, and versions generally range between 100MB and 200MB. You can choose any Android .iso file from this list, but we’ll use Android-x86-4.0-RC1 for the purpose of this article.
Step 3) Open Virtualbox and create a virtual machine. Name your machine whatever you like
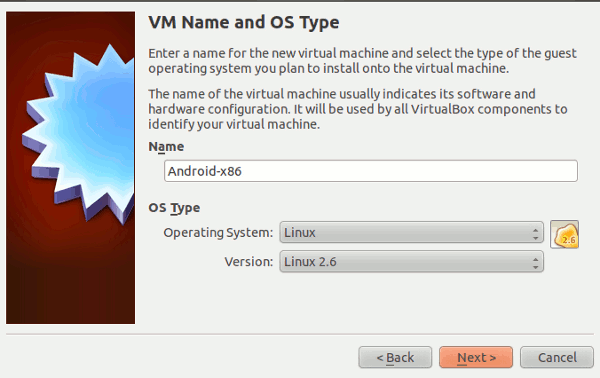
Step 4) Choose a base memory of 1000MB
Step 5) Click Create New Hard Disk and then choose VDI (VirtualBox Disk Image) as the file type
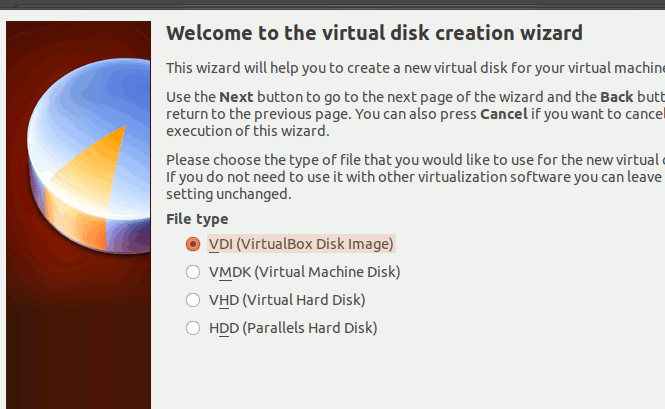
Step 6) Set Virtualbox to ‘Dynamically Allocated’ and then choose 8.0GB as the size
Step 7) Click on your VM to highlight it and then choose ‘Settings’ from the top menu bar
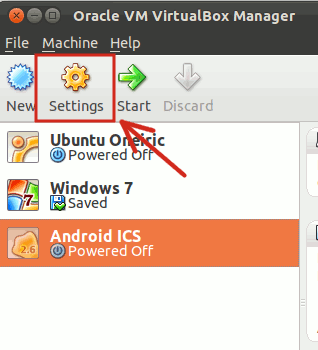
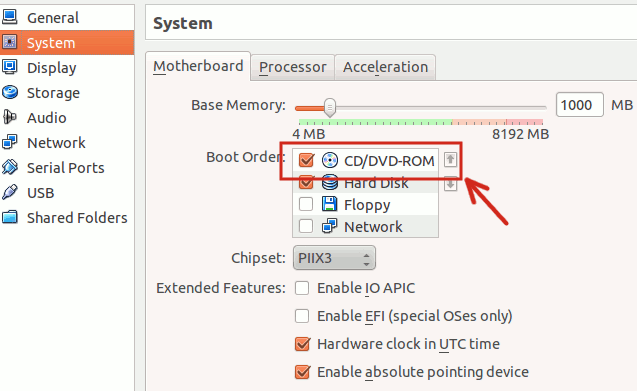
Step 8) On the left menu pane, click on System, then check CD/DVD-ROM as well as Hard Disk. Make sure CD/DVD-ROM is first in the boot order (i.e. at the top of the list. Press the arrow keys to change the boot order).
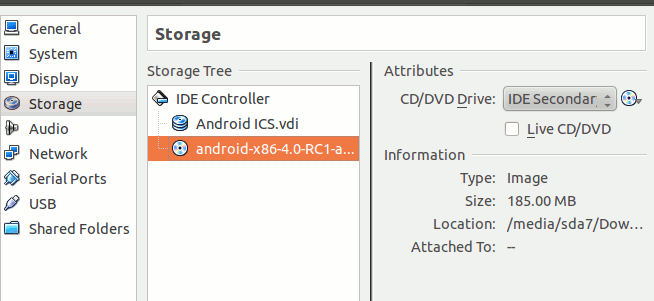
Step 9) Click on Storage on the side menu pane and choose the Android 4.0 .iso file that you downloaded in Step 2. Click OK to set that .iso as the primary boot option.
Step 10) Boot your new Android virtual machine. You can install Android or run it directly from the CD. Installing Android will be faster, but it takes considerably more time. To make things easier, choose to run Android without installation (i.e. Live CD mode). If you’re committed to installing Android, you can do so by reading through this helpful installation guide.
Step 11) Android 4.0 will boot up. However, you will probably notice that your mouse isn’t moving. You can change this by going to the Machine menu at the top of the screen and then by clicking on Disable mouse integration. Your mouse will now appear wherever you click within the Android OS. If you want to use your mouse to control your PC (outside of the Android VM) then you can do so by pressing the right CTRL button on your keyboard.
Step 12) You will be prompted to setup your Android account. To avoid confusing android and Google, setup a new Android account. Play around with Android, download some apps from the Google Play store, and then when you’re done messing around, close the VM by shutting the VM window (there is no power off button).
Whether you’re thinking of buying an Android device for the first time or you just want to try out the latest upgrade to your favorite mobile OS, Virtualbox is an easy and effective way to test drive Android without even leaving your home office chair.
