If you’re like me, then your smartphone is the only camera you own.
No, I’d rather not carry around a massive DSLR camera when I’m traveling, or worry about that camera being stolen. Instead, I’m happy to sacrifice a little bit of quality for a lot of convenience.
But thanks to the tips listed below, I don’t have to sacrifice
too much quality to take good smartphone photos. Today, I’m sharing the 10 best tips and tricks anyone can use to improve their smartphone photography skills:
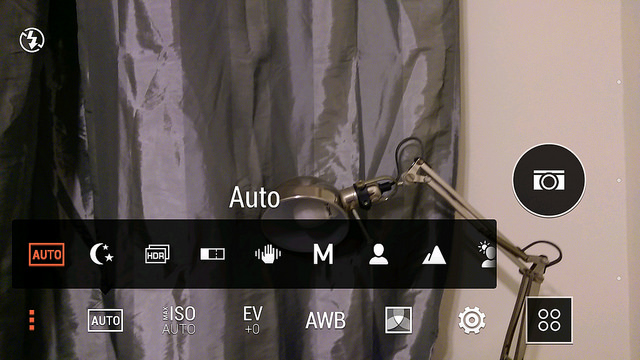
10) Identify your Auto Mode
All smartphone cameras have an Auto Mode. Auto Mode is the default setting on your camera, and on some cameras, it can be pretty good, or disappointingly bad. Check out the two pictures below. One was taken with Auto Mode exposure settings, while the other used manual exposure settings.
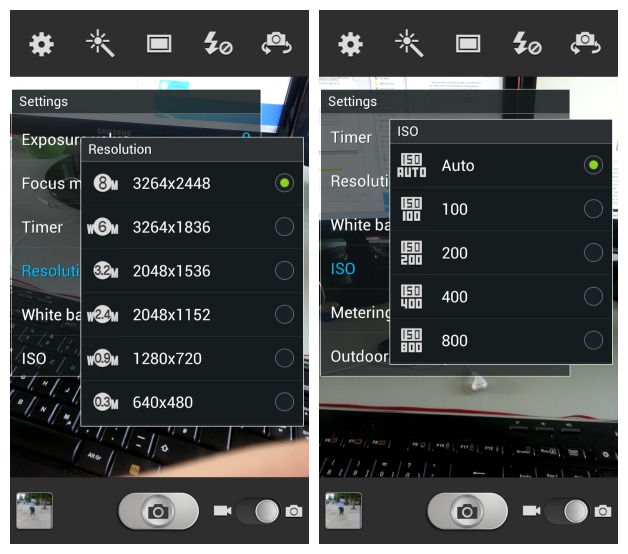
9) Edit your default settings
Default smartphone settings are designed to work well in
most environments and lighting conditions, but certainly not all. That’s why you should override the default settings to see if you can noticeably improve the quality of your photos. Some of the settings to play around with include:
-Metering (edit this if you’re experiencing poor-quality pictures indoors or in cloudy weather)
-White balance
-ISO (on auto by default. You can increase your ISO if you prefer more grain to blur).
-Spot metering (not all cameras have this setting, but it can be useful. Switch your phone from center-weighted to spot metering and you’ll notice images outside the center of the frame are sharper. By default, your camera highlights the center of the frame).
8) Understand the secrets of good photography posture
Unless you’ve got the steady hands of a brain surgeon, your hands probably shake a bit when taking a picture. It’s okay, I get nervous too sometimes.
One of the best secrets of smartphone photography is to lock your elbows to the sides of your body when taking a shot. Holding your arms outstretched in front of you can cause shaking. But gently resting your elbows against your sides is a great way to steady both arms.
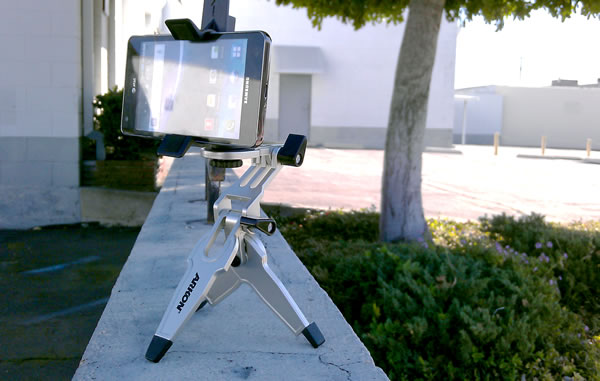
If you
really want to get the perfect shot, then consider investing in a smartphone tripod. Yes, there are smartphone tripods, and they’re not nearly as big as traditional camera tripods. You might feel a little silly bringing a tripod for a smartphone photo shoot. But hey, with the quality of today’s Android cameras, most people will understand.
7) Learn when to use HDR mode
HDR is a powerful smartphone tool that most people don’t know how to use. It’s one of the reasons the iPhone 6 camera has been so well-received: it uses HDR mode
very effectively.
HDR simply stands for high dynamic range. It’s ideal for capturing the details and shading in darker areas of the scene.

If you’re trying to take a picture which features both light and dark areas, then HDR mode can be the secret to the perfect photo. In HDR mode, your camera actually takes
two photos, with one photo focused on the light area and the other on the dark area.
Both Samsung and Apple smartphones are very good at HDR mode. Turn it on a take a few pictures to see if you notice the difference (hint: you will).
When to use HDR: Scenes with both dark and bright areas (like a concert, or a shady forest)
When not to use HDR: Fast-moving subjects or any movement (HDR will cause ghosting and blur due to slow smartphone shutter speeds)
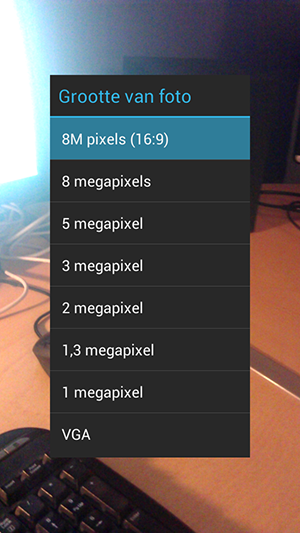
6) Use the whole sensor by switching to standard 4:3
One of the strange things about smartphone cameras is that many of them default to 16:9 image capture ratios despite the fact that the sensor is not 16:9.
One of the best smartphone photography tips I can give you is to use your whole sensor by switching to 4:3 image capture ratio (provided your smartphone has a 4:3 sensor)
This ratio still lets you crop the photo down to 16:9 quite easily, but you have more pixels to play with. This reduces the likelihood of a bad shot.
Now, not all smartphones have a 4:3 sensor. Some, like the Galaxy S5 and HTC One, use a 16:9 sensor, in which case you won’t have to change anything.
Look up your phone to see if you have a 4:3 sensor. If so, take a few pictures in 4:3 ratio to see if that makes a difference.
5) Edit your photo using Android apps or computer software
Your smartphone photos may look like crap, but they have potential.
To unlock that potential, you’ll need editing software. You can use Android apps like Snapseed to easily increase the saturation, edit the brightness, and bring out shadows. Or, if you’re looking for the perfect photo, consider using Lightroom on your computer.
I personally like using
Snapseed, but other popular editing apps include
Pixlr,
PicsArt, and
Photo Editor by Aviary.
All of these apps let you apply filters, crop your photo, and adjust everything from the colors to the sharpness. All of the apps linked above are also totally free.
4) Install alternative camera apps like Google Camera or Camera Zoom FX
One of the cool parts about Android is that you’re not locked to a default camera app. Instead, you can install alternative camera apps like Google Camera or
Camera Zoom FX, both of which are available for almost all Android devices.
Different camera software can have a huge effect on your smartphone photo skills. In many cases, they simply have smarter default settings.
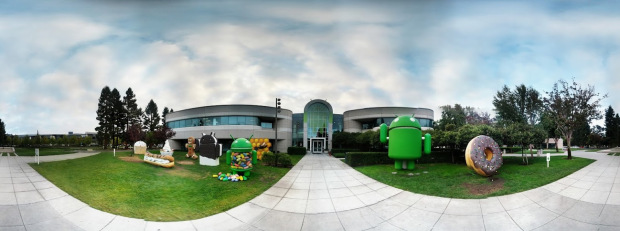
In other cases, you might install new camera software to enjoy new features. The Google Camera has the popular PhotoSphere feature, for example.
3) Use Macro focusing to improve your bokeh
If you haven’t heard of bokeh, then it’s basically the background blur behind your subject. Good bokeh enhances the subject while also highlighting some background features with subtle blurring.

You can use the “Macro focus” setting on your Android camera to improve your bokeh and get close to your subject. By default, your Android camera will likely be in auto focus mode.
2) Understand the basic rules of lighting
If you’re a professional photographer, then you probably already have artificial light sources. But if you’re an average smartphone photographer, then it’s far more practical to understand smart lighting practices. Here are some tips you can use to maximize lighting for smartphone photography:
-Avoid pointing your camera lens towards the sun
-Always try to shine light onto the subject without having that light hit the lens

-If you’re dealing with a particularly tricky lighting area, try adjusting your spot metering and exposure in the settings menu
-Use a white piece of paper to reflect natural light or artificial light onto your subject, which can cause the lighting to be less harsh than if it were focused directly onto the subject
-Browse through your camera’s lighting settings to see if there are default “Scene” modes. Many cameras have a “cloudy” or “indoors” mode, for example
1) Don’t zoom, crop
You probably already know this, but smartphone cameras aren’t really built for zooming. They use
digital zoom instead of optical zoom. Instead of actually zooming in on a subject, it’s just a way for smartphone users to feel better.
If you want to take a good picture of a small subject, then take a picture and then
crop your small subject.
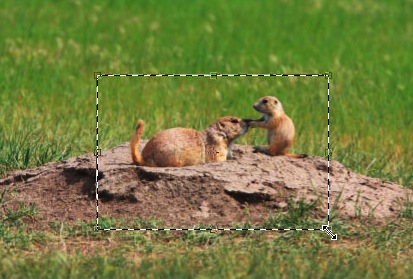
Zooming in on a subject reduces quality. In most cases, you’ll get better quality from simply cropping. At the very least, you get the flexibility to choose which part of the picture you want to zoom in on. You don’t get that flexibility if you zoom.
 If you’re trying to take a picture which features both light and dark areas, then HDR mode can be the secret to the perfect photo. In HDR mode, your camera actually takes two photos, with one photo focused on the light area and the other on the dark area.
Both Samsung and Apple smartphones are very good at HDR mode. Turn it on a take a few pictures to see if you notice the difference (hint: you will).
When to use HDR: Scenes with both dark and bright areas (like a concert, or a shady forest)
When not to use HDR: Fast-moving subjects or any movement (HDR will cause ghosting and blur due to slow smartphone shutter speeds)
If you’re trying to take a picture which features both light and dark areas, then HDR mode can be the secret to the perfect photo. In HDR mode, your camera actually takes two photos, with one photo focused on the light area and the other on the dark area.
Both Samsung and Apple smartphones are very good at HDR mode. Turn it on a take a few pictures to see if you notice the difference (hint: you will).
When to use HDR: Scenes with both dark and bright areas (like a concert, or a shady forest)
When not to use HDR: Fast-moving subjects or any movement (HDR will cause ghosting and blur due to slow smartphone shutter speeds)